Make a DIY Concealed Carry Holster In 60 Seconds!
YES, THIS IS TOTALLY DOABLE


Here at iconcealed.com we scour the internet for interesting items that we feel make a difference. And we recently ran across this cool little ditty originally posted by Kevin Pellegrino way back in 2016.
It’s a simple, 5-step process that requires only a few household items…
SUPPLY LIST
Go to your closet. Get a HANGER.
Go to your tool chest. Get some DUCT TAPE.
Now all you need are WIRE CUTTERS and PLIERS.
And if you happen to have a pair of needle nose pliers with built-in wire cutters… whoo-hoo!
Done and done.

STEP ONE: Cut your hanger
Using your wire cutters, cut the hanger on each side of the hook near the neck folds.

Next, bend the hanger into a long straight wire by folding each curved end outward.

Once your wire is straight, touch the two ends together and fold in half.
Squeeze the center together until you have about ½ inch of separation at the bend.

Don’t worry if the ends aren’t perfectly straight or overlap, it will get straightened out in later steps.
STEP TWO: Shape your belt hook
Once you’ve straightened your hanger and folded it in half, let’s shape it so it’s easy to wear.
First, make the hook that secures the holster to your belt. When you draw your gun, it releases quickly and the holster will stay in place.
Use your pliers to squeeze the rounded end of the wire about 1.5 inches from the arch and bend it 180 degrees.

Next, let’s shape the support frame for the holster.
Using your pliers, grab the long end of the wire at approximately the same length as the belt hook.
Bend the wire 180 degrees in the opposite direction of the belt hook and voila! Structure complete!

Now that you have the structure for your holster, it’s time to customize it for your weapon.
STEP THREE: Customize
Customize the size of the holster to fit your gun.
First, make sure your gun is unloaded.
Next, measure from the top of the curve you just made down the length of your gun barrel.

Pinch the two pieces of wire at the end of your barrel and bend the wire 160 degrees the opposite direction of your hooks at the top.

Lastly, measure the two loose ends of wire against your barrel and cut the wires about ½ to 2/3 the length of your barrel. Time for the finishing touches.

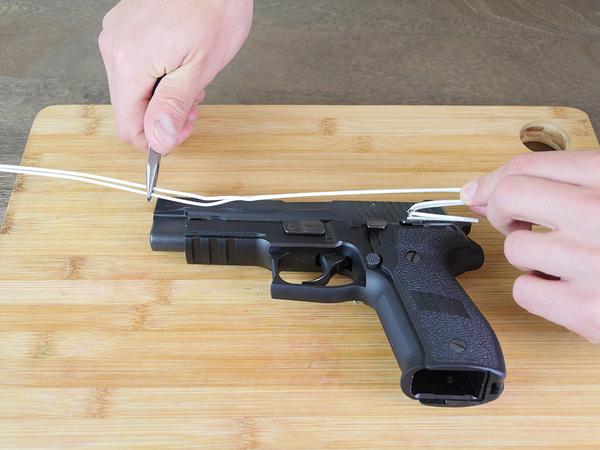
STEP FOUR: Wrap barrel
The final step involves your duct tape which will not only support the structure of the holster, it will also help to protect the barrel of your weapon (and your leg if you need to draw your weapon).
Start by cutting off a piece of duct tape approximately two inches long.
Next holding the two loose ends together, wrap the duct tape around both pieces of wire.

If you’d like a bit of extra protection, add an extra piece or two of duct tape
Once you’ve got the end taped, your DIY concealed carry holster is ready for action!

STEP FIVE: Go time
Putting on the holster is a breeze. First, slide the long end inside your pants near your hip and loop the first hook in the wire over the waist band of your pants.

Next, slide your belt into the second loop securing the holster in place.

Finally, insert your gun into your pants sliding the duct taped end into your gun barrel.
Fast, easy, reliable, DIY concealed carry holster in a matter of minutes.
Or in this case, 1 MINUTE !

YOU ARE SO READY
We at iconcealed.com know all too well that being prepared is more than just having the right gear or even knowing how to use it.
It’s also about being ready for anything even when you don’t have all the right tools at your disposal and you’re forced to improvise to stay alive!
Original Source: https://www.gotimegear.com/blogs/survival-skills/make-a-concealed-carry-holster